

What is Vector Conversion?
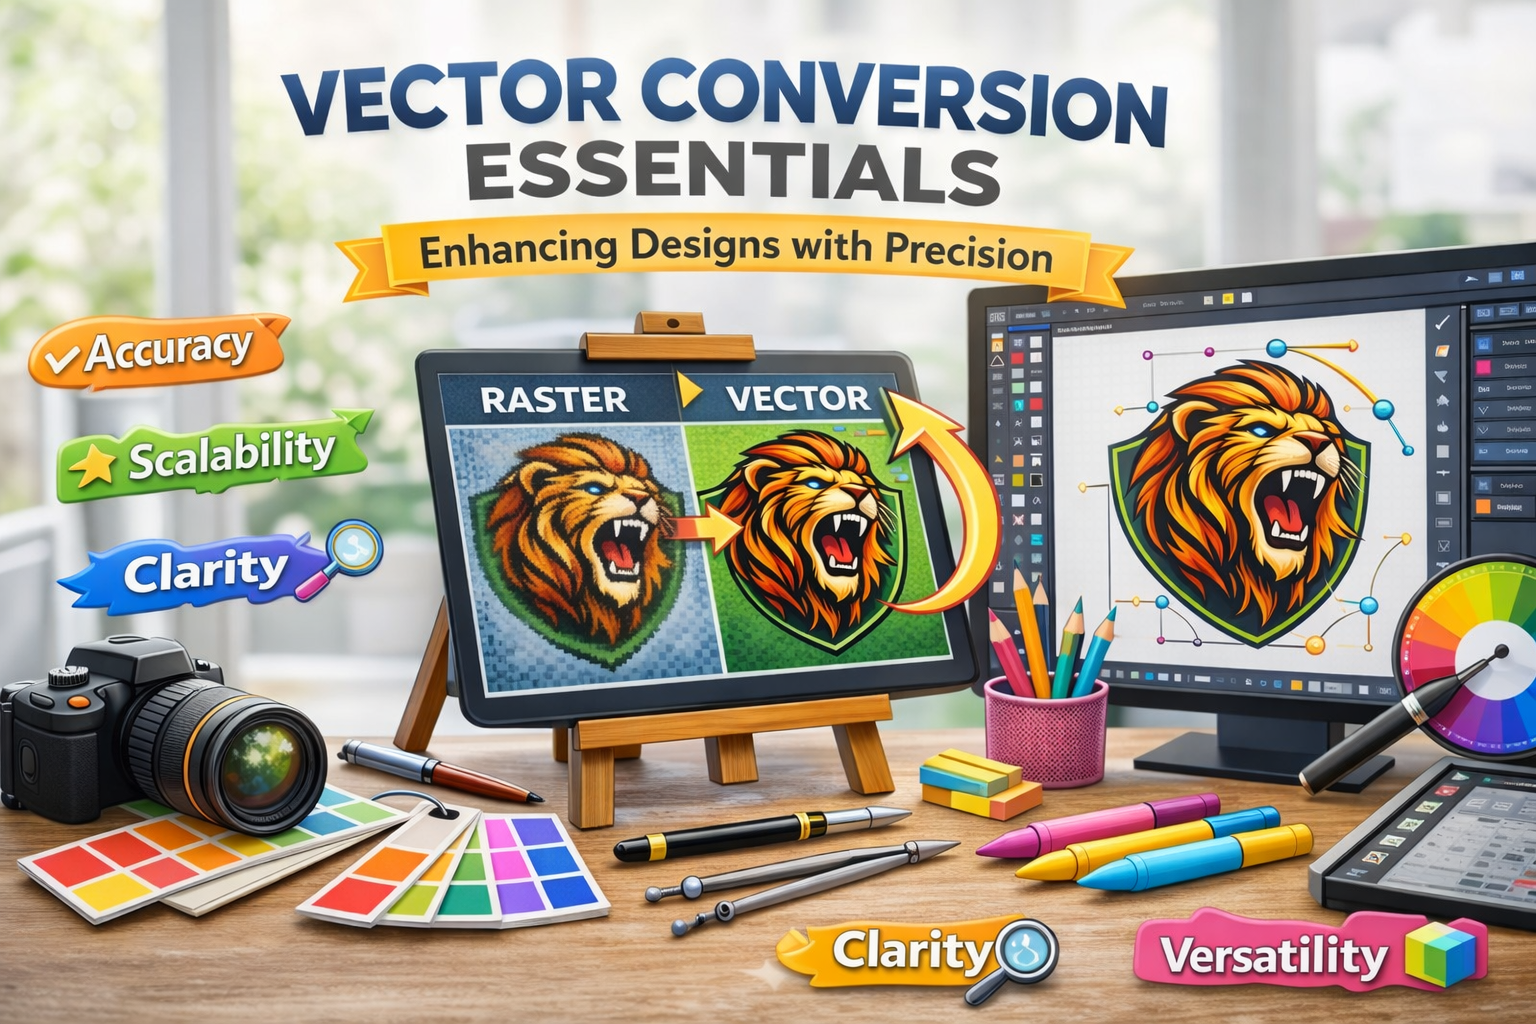
Vector conversion is the process of transforming raster images (like JPGs or PNGs) into vector graphics clean, scalable illustrations made of paths, lines, curves, and shapes. Unlike raster images, which pixelate when scaled, vectors maintain crispness and detail at any size.
For embroidery digitizers, this means no more struggling with blurry or low-resolution logos. With formats like AI, EPS, SVG, or PDF, you gain the flexibility to scale, adjust, and trace without compromising detail an essential foundation for high-quality embroidery.
Why Embroidery Digitizers Rely on Vectors
Embroidery digitizing is an art form that starts long before the stitches. The smoother and cleaner your artwork, the easier it is to plan stitch paths, set proper densities, and avoid registration issues. Here’s how vector files elevate digitizing work:
- Clean Lines = Clean Stitches: Vectors help define sharp edges and borders, ideal for satin stitches and borders.
- Scalability Without Distortion: Resize logos or monograms for caps, shirts, or bags without redrawing.
- Less Guesswork: Vectors remove ambiguity in outlines, curves, and details.
- Time-Saving: A well-prepared vector reduces prep time, allowing faster conversion into embroidery formats.
Common Vector Conversion Needs in Digitizing
Most digitizers face similar challenges poor-quality logos, screenshots, or scanned sketches from clients. Vector conversion helps with:
- Logo Cleanup: Turning jagged JPGs into stitchable assets.
- Appliqué Work: Simplifying shapes for fabric overlays.
- 3D Puff Designs: Isolating bold text or shapes for foam embroidery.
- Patch Borders: Creating accurate edge-to-edge shapes for merrowed or laser-cut patches.
Properly vectorized files give digitizers a strong foundation to build upon, especially for commercial jobs or bulk production.
Tools & Software Used for Vector Conversion
Several tools can assist in vector conversion, but not all are created equal especially for embroidery.
Popular Software:
- Adobe Illustrator: Industry standard with precise pen tools and manual trace capabilities.
- CorelDRAW: Popular in apparel industries, especially for laser and vinyl work.
- Inkscape: A powerful, free alternative that handles basic vector tasks well.
Auto-Trace vs. Manual Tracing:
While auto-trace features are tempting, they often introduce unnecessary nodes, artifacts, and jagged lines. Manual tracing, though time-consuming, ensures cleaner paths crucial for accurate digitizing.
Digitizers should aim for vector art that mirrors embroidery logic: smooth curves, simple shapes, and no unnecessary complexity.
Best Practices for Precise Vector Conversion
To ensure your vector files are embroidery-ready, follow these best practices:
- Simplify Complex Artwork: Eliminate extra details that won’t show up well in thread.
- Clean Edges: Use bezier curves to smooth out rough outlines.
- Convert Strokes to Shapes: Strokes may disappear during import always expand them.
- Use Fewer Nodes: Fewer control points mean smoother stitch lines.
- Check for Overlaps: Hidden or stacked objects may cause misalignment in stitching.
By vectorizing with embroidery in mind, you can save yourself hours of fixing broken paths or realigning stitches later.
Collaborating with Vector Artists or Services
Outsourcing vector work? Great! Just be sure to communicate like a pro.
What to Request:
- File types: AI, SVG, or EPS
- All fonts converted to outlines
- No strokes or effects (everything should be expanded)
- Minimal anchor points
- Grouped and organized by layers or colors
Questions to Ask:
- Is the artwork manually traced?
- Do they understand embroidery or production specs?
- Can they simplify intricate designs without losing key details?
Working with an experienced vector artist ensures your embroidery files don’t just look good on screen they stitch beautifully too.
Mistakes to Avoid
Digitizers and vector artists alike often make these common mistakes:
- Relying on Auto-Trace Alone: Creates messy paths that confuse embroidery software.
- Overcomplicating the Design: Too many details = thread chaos.
- Ignoring Stitch Constraints: Very thin or intricate shapes don’t translate well into thread.
- Unconverted Text: Missing fonts can wreck your vector file integrity.
A clean vector is not about artistic flair it’s about functionality in a thread-based medium.
Real-World Examples
Let’s consider this common scenario: A client sends a 200×200 pixel PNG logo to be embroidered on caps. It’s blurry, full of gradients, and totally unsuitable for digitizing. After a proper vector conversion:
- The design is simplified into bold shapes.
- The blurry lines are replaced with sharp, defined curves.
- Stitch-friendly areas are clearly defined.
The result? An embroidery file that looks professional, runs smoothly on the machine, and keeps the client happy all thanks to a solid vector base.
Final Thoughts: Precision is Power
Vector conversion might not seem glamorous, but for embroidery digitizers, it’s one of the most powerful tools in your creative arsenal. It reduces time, improves stitch quality, and gives you the confidence to digitize even the most complex designs.
Remember: Every beautiful embroidery file starts with a clean, scalable, stitch-friendly vector. Mastering vector conversion or working with the right experts is your ticket to embroidery excellence.